2Installation
2.1System requirements
2.1.1Microsoft Windows
mdm 1.12.x can
only be installed on supported Microsoft Windows systems if the required
preconditions are fulfilled (see Table 2-1
on page 12).

NOTE: Incorrectly installed
Microsoft Visual C++
2017 Redistributable Package (x64) may break current
mdm installation
Prior to the installation
or update of mdm, Microsoft
Visual C++ 2017 Redistributable Package (x64) (or
newer versions) must have been successfully
installed on the Windows system.
Download:
https://aka.ms/vs/16/release/VC_redist.x64.exe
NOTE: It is possible that the specified
link is no longer valid. In any case make sure that the correct
version is used!
Precondition: All current Windows
Update Packages must have been installed first.
Make sure that the package has been
installed without warnings or error messages.
If the
package has been installed unsuccessfully or incomplete, the mdm
installation may fail and break existing mdm installations. |

NOTE: All current Windows Update
Packages must have been installed
Prior to the installation
or update of mdm or Windows components, all available update
packages for the Windows operating system must have been successfully installed.
Caution:
It might be necessary to re-check several times that all necessary
packages have been installed. Sometimes some of the packages will
not be installed during the first or even second Windows Update
session. |
Upgrade mdm
If your system does not fulfill the system
requirements demanded in Table 2-1 and
Table 2-2,
mdm server and
mdm CA server databases
must either be dumped and imported to a newly installed mdm 1.12.x
or the installed mdm version must be upgraded stepwise to mdm 1.12.x (see
“Upgrade
mdm installations to mdm 1.12.x” on page 22).
Table 2-1
System requirements (Microsoft
Windows)
|
mdm Client |
mdm Server |
mdm CA |
Supported
operating system |
–Windows
Server 2016
–Windows
Server 2012 R2
–Windows
10 (mdm client only)
–Windows
7 (mdm client only) |
Hardware |
–A
minimum of 512 MB RAM
–500 MB
free hard disk space
–Color
monitor with at least 1280 x 1024 resolution |
–A
minimum of 4 GB RAM
–100 GB
free hard disk space |
–A
minimum of 512 MB RAM
–5 GB
free hard disk space |
Software
components |
–Third-party
components (PostgreSQL
10.14, Apache Webserver 2.4.46, OpenJDK 11.0.9, Python 3.8.3,
and OpenSSL 1.1.1g) will automatically be
installed via the mdm 1.12.x
Installer for Windows.
–Apache Web Server requires
Microsoft Visual C++ 2017 Redistributable
Package (x64) (or newer) to be installed.
Download:
https://aka.ms/vs/16/release/VC_redist.x64.exe
NOTE: It is possible that the specified
link is no longer valid. In any case make sure that the correct
version is used!
–mdm
clients, independently run on systems other than the “server system“,
require the Java platform OpenJDK
11 to be installed. |
Precondition |
–If
not installed via mdm Installer
for Windows:
OpenJDK 11 |
–mdm
not installed (or mdm 1.11.0
or later installed).
–PostgreSQL not
installed (or installed by previous mdm installations).
–Apache Web Server not installed
–(or
installed and listening to a port other than 443),
–(or
installed by previous mdm installations).
–Microsoft Visual C++ 2017 Redistributable
Package (x64) (or
newer) installed. |
2.1.2Ubuntu
Linux
mdm 1.12.x
can only be installed on supported Ubuntu Linux systems if the required
preconditions are fulfilled (see Table 2-2
on page 13).
Upgrade mdm
If your system does not fulfill the system
requirements demanded in Table 2-1 and
Table 2-2,
mdm server and
mdm CA server databases
must either be dumped and imported to a newly installed mdm 1.12.x
or the installed mdm version must be upgraded stepwise to mdm 1.12.x (see
“Upgrade
mdm installations to mdm 1.12.x” on page 22).
Table 2-2
System requirements (Ubuntu
Linux)
|
mdm Client |
mdm Server |
mdm CA |
Operating
system |
–Ubuntu
Desktop 18.04 LTS |
–Ubuntu
(Server) 18.04 LTS |
Hardware |
–A
minimum of 512 MB RAM
–500 MB
free hard disk space
–Color
monitor with at least 1280 x 1024 resolution |
–A
minimum of 4 GB RAM
–100 GB
free hard disk space |
–A
minimum of 512 MB RAM
–5 GB
free hard disk space |
Software
components |
–Third-party
components (PostgreSQL 10,
Apache Webserver 2.4, OpenJDK 11, Python 3.8, and OpenSSL 1.1.x) will automatically
be installed via the package management of Ubuntu. |
Precondition |
–If
not installed via Ubuntu‘s package managing tools:
OpenJDK 11 |
–mdm
not installed (or mdm 1.11.0
or later installed).
–All
components of previous mdm installations < 1.7.0 must
have been removed. |
2.1.3Other
requirements

The PostgreSQL database does not support
the FAT32 file system. In this case it is strongly recommended
to convert the file system to NTFS by using the convert.exe
command before installing PostgreSQL. For more information on
the convert-tool please enter help convert
on the command line. |
Software and license
Contact Phoenix Contact for information on how to obtain
the software and a license. Please visit the web site phoenixcontact.net/products and
search for FL MGUARD DM for
further information or purchase a license in the PHOENIX CONTACT Webshop at
phoenixcontact.net/product/2981974

If you do not specify a license file
during installation, the mdm server will start in evaluation
mode (Evaluation License)
with an allowed number of 10 devices and 2 concurrently
connected clients. |
2.2Install
mdm 1.12.x and components
2.2.1mdm 1.12.x Installer for Windows

Run the installation program as the
Local Administrator of the Windows
system. The installation by another user with (only)
administrator rights may lead to an error. |
If you plan to run the mdm server, the PostgreSQL
database server, and the mdm CA server (if applicable) on a single Microsoft
Windows system, the automatic installer program can be used.
The installer program can additionally set
up the server as a configuration pull server (see “Upload configurations to mGuard devices”
on page 131) or as a firmware upgrade server (see “Manage
firmware upgrades with mdm” on page 147).
Preconditions
The following system requirements and preconditions
must be fulfilled (see Table 2-1
on page 12).
Installation of the license file
Copy the license file to a folder of your
choice. You will be prompted for the file during the installation process.
The path of the license file can be configured in the preferences.xml
file afterwards (see “mdm server (preferences.xml file)” on page 183). Install
the license file prior to the start of the server.

If you do not specify a license file
during installation, the mdm server will start in evaluation
mode (Evaluation License) with an allowed number of
10 devices and 2 concurrently connected clients. To purchase a
license, visit the PHOENIX CONTACT Webshop at phoenixcontact.net/product/2981974. |
mdm installation
procedure
To
install mdm on supported Microsoft Windows systems, proceed as follows:
1.Make
sure that the system requirements in Table 2-1 are met.
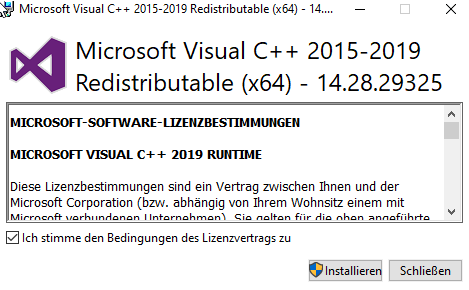
2.Install
the package Microsoft Visual C ++ 2017
Redistributable Package (x64) or
newer.
Figure 2-1 Install Microsoft
Visual C
++ 2015-2019
Redistributable Package (x64)
3.Run
the installer program with as the Local Administrator
of the Windows system.
4.Click
the Next button on the welcome screen
and accept the mdm and third-party software licenses on the following
screens.
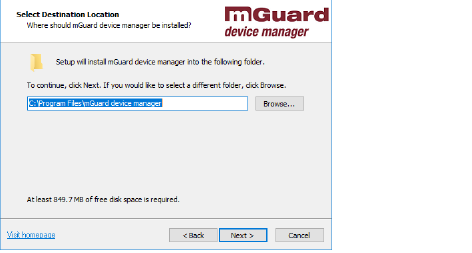
5.Select
a location where to install mdm. The default location usually needs not
be modified.
Figure 2-2 Select destination location
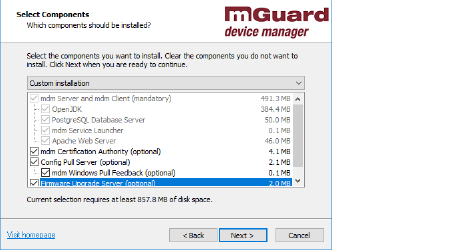
6.Choose
which mdm components to install.
NOTE:
The notification that an upload to an FL MGUARD 1000 device was successful
or failed can only be reported back to mdm and displayed there if the
"mdm Windows Pull Feedback" option is selected.
Figure 2-3 Install mdm components
The mdm Server, OpenJDK, PostgreSQL Database
Server, mdm Service Launcher (used to run the mdm server as a service),
and Apache Web Server are always installed, while the mdm Certification
Authority (CA) is optional.
The Apache Web Server can also optionally
be set up as Configuration Pull Server and Firmware Upgrade Server.
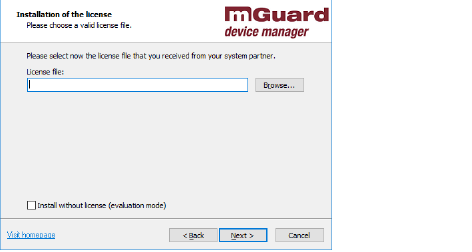
7.Provide
a license file for the mdm server or skip license file installation to
run mdm in evaluation mode.
Figure 2-4 Installation of the license
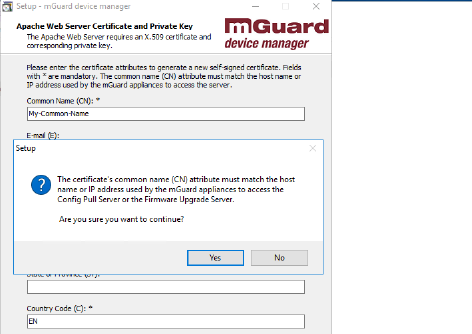
8.The
installer program creates a self-signed X.509 certificate and a matching
private key to be used by the https web server. Enter attributes to be
used for the certificate.
Figure 2-5 Attributes to be used for
the certificate
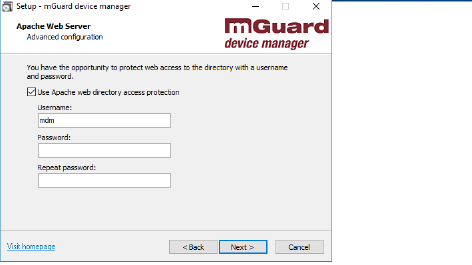
9.Access
to the directories served by the web server can optionally be protected
with a user name and password. Choose whether you want this protection,
and if so, enter a user name and password.
Figure 2-6 Apache Web Server – Web
access protection
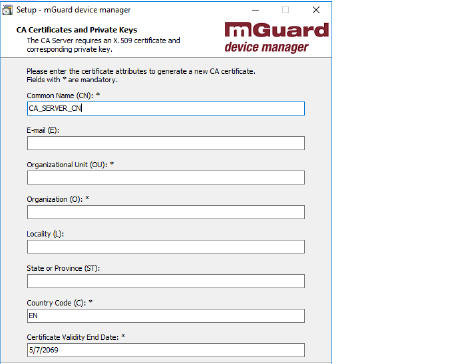
10.The
following applies only if the mdm CA is installed: The installer program
creates a CA certificate and matching private key. Enter attributes to
be used for the certificate.
Figure 2-7 Attributes to be used for
the certificate
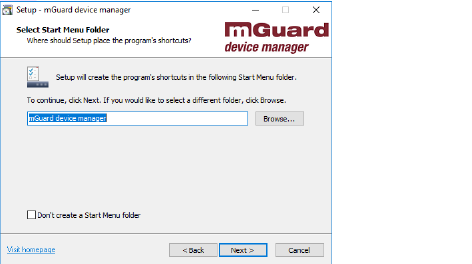
11.The
installer can optionally add shortcuts to the Start menu. If this is desired,
choose a folder to which to add the shortcuts.
Figure 2-8 Start Menu Folder – Shortcuts
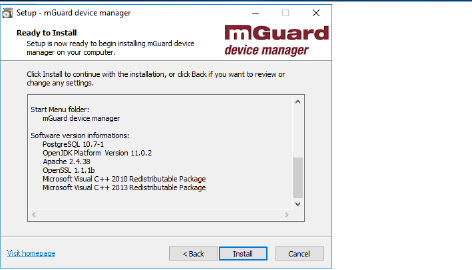
12.Click
on the Install button.
Figure 2-9 Install mdm
The mdm components will be installed on the
system. The locations served through the Apache web server will be reported.
mdm is now ready to be used.
2.2.2Ubuntu‘s package management
tools
For the installation of the following mdm
components on Ubuntu Linux, the automatic installation via Ubuntu‘s package
management tools and the mdm software
repository can be used.

Privacy
notice: Access to the mdm
software repository server is logged to ensure the security
and stability of the service. Only anonymized data is retained
for statistical analysis. |
Table 2-3
Installable packages from the mdm software repository
Package |
Description |
mdm-all-server |
Meta package to install all
mdm server components. |
mdm-common |
Contains basic components required
to install mdm. |
mdm-server |
Contains the server component
of mdm.
Starts as systemd service. |
mdm-client |
Contains the client components
of mdm.
Starts as systemd service. |
mdm-ca |
Contains the CA components of
mdm (CA server). |
mdm-configpull |
Sets up the apache2 server to
provide the mdm configuration pull feature (see “Upload configurations to mGuard devices”
on page 131). |
mdm-clientdownload |
Sets up the apache2 server to
allow the mdm client download. |
mdm-webbase |
Configures apache2 for mdm and
allows it to be used as firmware server (see “Manage firmware upgrades with mdm”
on page 147). |
PostgreSQL database
server and OpenSSL may
be automatically installed from Ubuntu‘s standard repositories.
Preconditions
The following system requirements and preconditions
must be fulfilled (see Table 2-2
on page 13).
Installation of the license file
Save the license file as /etc/mdm/mdm-server/mdmlic.lic.
The path of the license file can be configured in the preferences.xml
file afterwards (see “mdm server (preferences.xml file)” on page 183).
If you do not specify a path for the license file in the preferences.xml file,
mdm assumes the license file to be in the same directory as the mdm server.
Install the license file prior to the installation
of the mdm server package into /etc/mdm/mdm-server/mdmlic.lic,
creating the path as needed, or restart the server manually after you
have installed a new license.
Analyzing server log files
mdm server
Output of the complete log entries of the
mdm server:
journalctl
-u mdm-server.service
Output of the log entries of the mdm server
since the last reboot:
journalctl -b -u mdm-server.service
mdm CA Server
Output of the log entries of the mdm CA server:
journalctl -u mdm-ca.service
Output of the log entries of the mdm CA server
since the last restart:
journalctl -b -u mdm-ca.service
The mdm CA server log files are also saved
by Ubuntu to the file: /var/log/mdm-ca.log
.
Full mdm installation
To install mdm and
components on Ubuntu (Server) 18.04 LTS using Ubuntu‘s package
management tools, proceed as follows:

You need administrator rights to install
mdm and components. |

Make sure, that the correct repository
has been successfully added to the file /etc/apt/sources.list.
Check the integrity of the provided repository key. |

If mdm 1.12.x is
installed via the command line, the variable DEBIAN_FRONTEND must
be used with the value readline to
install the package mdm-common.
This is obligatory to display and accept the Software
License Terms (SLT). |

Copy your mdm license file mdmlic.lic to
the directory /etc/mdm/mdm-server/
(default setting in preferences.xml)
before you install mdm. |
1.Download
the public key of the repository (pubkey.gpg):
wget http://repositories.mguard.com/pubkey.gpg
2.Check
the fingerprint of the public key:
gpg -finger pubkey.gpg
The fingerprint must
match the following fingerprint:
AD3E B1F9 473D 5CC7 2ED4 2D4C 0571 79A3
CC0F FA55
3.Add
the public key of the repository (pubkey.gpg)
to the GPG public keyring (trusted.gpg):
sudo apt-key add
pubkey.gpg && apt-key list
4.Add
the mdm software repository
to your package management tool:
sudo apt-add-repository „deb http://repositories.mguard.com/mdm 1.12.x/“
5.Reload
the package information:
sudo apt update
6.Display
the available mdm packages by searching for the term mdm:
sudo apt search mdm
7.Install
and agree to the Software License Terms
(SLT) before installing mdm:
sudo
DEBIAN_FRONTEND=readline apt install mdm-common
8.Install
mdm and server components:
sudo apt install mdm-all-server
Follow the on-screen instructions and enter
mandatory and optional parameters (e.g. for CA component and configuration
pull server).
9.Install
mdm client using the package management tools:
sudo apt install mdm-client
Quick mdm server and client installation
(full installation)
wget http://repositories.mguard.com/pubkey.gpg
sudo apt-key add pubkey.gpg
sudo apt-add-repository "deb
http://repositories.mguard.com/mdm 1.12.x/"
sudo apt update
sudo DEBIAN_FRONTEND=readline apt install mdm-common
sudo apt install mdm-all-server mdm-client
2.3Upgrade mdm installations to mdm
1.12.x
Since mdm versions 1.5.2 (Windows) and 1.7.0
(Windows and Ubuntu) mGuard device
manager as well as mdm and third-party components can be installed
and upgraded automatically via the included mdm
Installer for Windows or Ubuntu‘s package management tools.
If your system does not fulfill the system
requirements demanded in Table 2-1 and
Table 2-2,
mdm server and
mdm CA server databases
must either be dumped and imported to a newly installed mdm 1.12.x
or the installed mdm version must be upgraded stepwise to mdm 1.12.x.
The following chapters describe
–how
to upgrade your mdm installation and third-party components and
–how
to migrate your existing mdm databases on Windows and Linux systems using
batch files and shell scripts (see “Using batch files and shell scripts” on
page 34).
2.3.1General
notes

NOTE: Backup important files
and databases
Keep backup copies of the following
files and databases to avoid data loss during the upgrade process
of mdm:
–current
mdm server and mdm CA server databases
–preferences.xml and ca-preferences.xml
These files usually contain individual parameters that are to be
taken over again after the upgrade.
–mdm license file
You need the license file to use
the mdm to its full extent. |

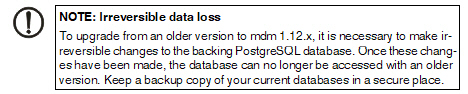
NOTE: Incompatibility of PostgreSQL
databases
To
upgrade from an older version to mdm 1.12.x, it is necessary to make irreversible
changes to the backing PostgreSQL database. Once these changes
have been made, the database can no longer be accessed with an
older version. |

Migrating mdm installations with the
provided batch files/shell scripts restores only the database(s)
dumped and imported. Any other installation data (e.g. pull server
certificate and config files) must be manually copied to the new
installation as explained below. |

The provided batch files/shell scripts
will only work in case of standard mdm installations (check default
database names, ports, and user names in the provided preferences.xml and
ca-preferences.xml files). |

mdm server (and CA server) will be
stopped and restarted during the dump generation process. |
2.3.2Upgrade mdm on Microsoft Windows
systems
Upgrade
on supported Microsoft Windows systems |
From
mdm 1.11.0
or later |
To
upgrade mdm version 1.11.x on
supported Microsoft Windows systems, use the mdm 1.12.x Installer for Windows (see
“mdm
1.12.x Installer for Windows” on page 14)
It is not necessary to uninstall
mdm version 1.11.x and
components.
The mdm
Installer for Windows will automatically create database
dumps of the current mdm installation 1.11.x. |
From mdm < 1.11.0 |
To
upgrade installed mdm version 1.5.2 or later on supported Microsoft
Windows systems, there are two options:
1.mdm Installer for Windows: Upgrade
the current mdm installation stepwise to the next minor version,
using the corresponding mdm
Installer for Windows, until mdm 1.11.x is installed (e.g.
from mdm 1.5.2 >> 1.6.2 >> 1.7.0 >> 1.8.0
>> 1.9.x >> 1.10.x >> 1.11.x
to mdm 1.12.x) or
2.Database dumps: create, export and
import database dumps of the mdm
sever and CA server
databases as described below:
–dump
and backup the databases
–remove
the complete mdm installation,
–install
mdm 1.12.x via
the mdm 1.12.x Installer for
Windows,
–import
the dumped databases.
To dump and backup the
databases, proceed as follows: |
|
|
A)Make database dumps of the mdm and mdm
CA server database
1.Copy
the required batch files to the Windows system where mdm is installed.
2.Execute
(as administrator) the batch file export_mdm_server.bat
.
3.Provide
the path where the database dump shall be saved
(default: C:\Users\username\Documents\mdm-server.sql).
4.Provide
the path to your current mdm installation directory
(default: C:\Program Files\mGuard
device manager).
5.Provide
the password of the database user innomms
if required.
6.Press
any key to close
the command prompt when the database dump generation has finished.
7.(If
necessary) Repeat 1–6 but execute
the batch file export_mdm_ca.bat to
dump the mdm CA server database (default:
mdm_ca_server.sql, database
user = mdmca). |
|
B)Keep a backup copy of the database dumps
1.Open
the directory where the database dumps have been saved.
2.Copy
the database dump(s) created at (A) to a secure place (e.g. a
secure backup folder at another company server). |
|
C)(If necessary) Backup the pull server configuration
1.To
backup the web server configuration file, copy the following file
to a secure place:
<path
to mdm installation>\apache\conf\extra\httpd-mdm.conf
–Search
for the following entries (your entries may differ from the default
settings of the mdm Installer given below) and write down the
aliases of the pull config server:
#
Verzeichnis für ATV-Profile (wie in preferences.xml eingestellt).
#
Alias /atv/ /var/apache-data/atv/
#
<Directory /var/apache-data/atv/>
Alias
/atv/
“C:/Program Files/mGuard device manager/apache-data/atv/"
Alias
/atv
“C:/Program Files/mGuard device manager/apache-data/atv/"
–If
you have configured a service to send the pull feedback to mdm,
search for and write down the following entries (CustomLog) as
well:
#
Pull Config-Feedback an den mdm-Server (derzeit auskommentiert).
#
CustomLog "| /bin/nc -u -i1 127.0.0.1 7514" common
<your
feedback configuration>
2.To
backup the certificate and private key, copy the following files
to a secure place:
<path
to mdm installation>\apache\conf\server.crt
<path
to mdm installation>\apache\conf\server.key |
|
D)Remove
the complete mdm installation from the Windows system
1.Remove
the mdm installation by using its own unistaller or Microsoft
Window‘s standard uninstall procedures (e.g. Control
Panel\Programs\Programs and Features). |
|
E)Install mdm 1.12.x and desired components
via the mdm 1.12.x Installer for Windows.
1.Use
the mdm 1.12.x Installer for
Windows as described in Chapter 2.2.1.
|
|
F)Import the dumped databases (mdm server and
mdm CA server)
1.Make
the dumped databases available on the system where mdm 1.12.x has
been installed.
2.Execute
(as administrator) the batch file import_mdm_server.bat
.
3.Provide
the path to the database dump
(default: C:\Users\username\Documents\mdm-server.sql).
4.Provide
the installation path of mdm 1.12.x
(default: C:\Program Files\mGuard
device manager).
5.Provide
the password of the database user innomms
if required.
6.Press
any key to close the
command prompt when the database import has finished.
7.(If
necessary) Repeat 1–6 but execute
the batch file import_mdm_ca.bat to
import the dumped mdm CA server
database (default: mdm_ca_server.sql,
database user = mdmca).
8.mdm
will restart automatically and connect to the imported databases.
|
|
G)(If
necessary) Update the firmware upgrade/pull server configuration
1.Open
Apache HTTP Server Monitor (included
in the mdm installation) and stop the
service ApacheMDM.
2.Compare
the web server configuration file, with the backup file copied
and stored in step (C):
<path
to mdm installation>\apache\conf\extra\httpd-mdm.conf
–Compare
the aliases of the pull config server. If your former settings
differ from the default settings of the mdm Installer (given below),
replace the default settings accordingly to your settings (e.g.
Alias /my_company_atv/ ):
Alias
/atv/ “C:/Program
Files/mGuard device manager/apache-data/atv/"
Alias
/atv
“C:/Program Files/mGuard device manager/apache-data/atv/"
–Update
the pull configuration feedback to the mdm server, if it must
be configured:
#
Pull Config-Feedback an den mdm-Server (derzeit auskommentiert).
#
CustomLog "| /bin/nc -u -i1 127.0.0.1 7514" common
<your
feedback configuration>
3.Copy
the certificate and private key, backed up and stored in step
(C) to
<path
to mdm installation>\apache\conf\server.crt
<path
to mdm installation>\apache\conf\server.key
4.Open
Apache HTTP Server Monitor
and start the service
ApacheMDM. |
Upgrade
on unsupported Microsoft Windows systems |
All
mdm versions |
mdm
versions installed on unsupported Windows systems cannot be upgraded
to mdm 1.12.x.
To reuse the databases of these
mdm versions on supported Windows systems, you have to:
–dump
and backup the databases,
–install
mdm 1.12.x via
the mdm 1.12.x Installer for
Windows on a supported system,
–import
the dumped databases.
To dump and import the mdm
server database and mdm
CA server database, proceed as described above (“From mdm < 1.11.0” on page 23). |
Upgrade
on Linux systems |
All
mdm versions |
To
reuse the databases of mdm versions, installed on Linux systems,
on supported Windows systems, you have to:
–dump
and backup the databases,
–install
mdm 1.12.x via
the mdm 1.12.x Installer for Windows on
a supported system,
–import
the dumped databases.
Proceed as follows: |
|
|
A)Make
database dumps of the mdm and
mdm CA server database
1.Copy
the required shell script files to the Linux system where mdm
is installed.
2.Execute
(as sudo) the shell script export_mdm_server.sh
.
3.Provide
the path where the database dump shall be saved
(default: /tmp/mdm-server.sql).
4.Provide
the password of the database user innomms
if required.
5.(If
necessary) Repeat 1–4 but execute
the shell script export_mdm_ca.sh to
dump the mdm CA server database (default:
mdm_ca_server.sql, database
user = mdmca). |
|
B)Keep a backup copy of the database dumps
1.Open
the directory where the database dumps have been saved.
2.Copy
the database dump(s) created at (A) to a secure place (e.g. a
secure backup folder at another company server). |
|
C)(If necessary) Backup the pull server configuration
1.To
backup the web server configuration file, copy the following server
configuration file to a secure place. E.g. if you are using Apache
2.x, your configuration file may be stored in: /etc/apache2/sites-available/your-server.conf
.
–If
your server configuration defines any aliases for the pull configuration
directory, write them down. They may look like:
Alias
/atv/
“/var/www/mdm-pull/"
Alias
/atv
“/var/www/mdm-pull/"
2.To
backup the certificate and private key, proceed as follows:
–Check
the configuration file from step (1.) (e.g. /etc/apache2/sites-available/your-server.conf)
and look for the certificates used by your server. E.g. if you
are using Apache 2.x, the entries may look like:
SSLCertificateFile /etc/mdm/mdm-pull-server/cert.pem
SSLCertificateKeyFile /etc/mdm/mdm-pull-server/key
–Copy
those files to a secure place, using the following file names:
<path
to certificate>/server.crt
<path
to certificate>/server.key |
|
D)Install mdm 1.12.x and desired components
via the mdm 1.12.x Installer for Windows.
1.Use
the mdm 1.12.x Installer for
Windows as described in Chapter 2.2.1.
|
|
E)Import the dumped databases (mdm server and
mdm CA server)
1.Make
the dumped databases available on the system where mdm 1.12.x has
been installed.
2.Execute
(as administrator) the batch file import_mdm_server.bat
.
3.Provide
the path to the database dump
(default: C:\Users\username\Documents\mdm-server.sql).
4.Provide
the installation path of mdm 1.12.x
(default: C:\Program Files\mGuard
device manager).
5.Provide
the password of the database user innomms
if required.
6.Press
any key to close the
command prompt when the database import has finished.
7.(If
necessary) Repeat 1–6 but execute
the batch file import_mdm_ca.bat to
import the dumped mdm CA server
database (default: mdm_ca_server.sql,
database user = mdmca).
8.mdm
will restart automatically and connect to the imported databases.
|
|
F)(If
necessary) Update the firmware upgrade/pull server configuration
1.Open
Apache HTTP Server Monitor (included
in the mdm installation) and stop the
service ApacheMDM.
2.Compare
the web server configuration file, with the backup file copied
and stored in step (C):
<path
to mdm installation>\apache\conf\extra\httpd-mdm.conf
–Compare
the aliases of the pull config server. If your former settings
differ from the default settings of the mdm Installer (given below),
replace the default settings accordingly to your settings (e.g.
Alias /my_company_atv/ ):
Alias
/atv/
“C:/Program Files/mGuard device manager/apache-data/atv/"
Alias
/atv
“C:/Program Files/mGuard device manager/apache-data/atv/"
–Update
the pull configuration feedback to the mdm server, if it must
be configured:
#
Pull Config-Feedback an den mdm-Server (derzeit auskommentiert).
#
CustomLog "| /bin/nc -u -i1 127.0.0.1 7514" common
<your
feedback configuration>
3.Copy
the certificate and private key, backed up and stored in step
(C) to
<path
to mdm installation>\apache\conf\server.crt
<path
to mdm installation>\apache\conf\server.key
4.Open
Apache HTTP Server Monitor
and start the service
ApacheMDM. |
2.3.3Upgrade mdm on Ubuntu Linux
systems
Upgrade
on supported and unsupported Linux systems |
From
mdm 1.11.0 or later (installed on Ubuntu 18.04 LTS) |
To upgrade mdm versions 1.11.0
or later, installed on Ubuntu Server 18.04 LTS, you have to:
–upgrade
mdm to mdm 1.12.x
via Ubuntu‘s package management tools:
see
“Quick Guide (Ubuntu): Upgrade mdm 1.11.x
to 1.12.x” on page 38
For further information see “Minor
release updates” on page 40 and “Ubuntu‘s package management tools”
on page 19. |
From
mdm 1.10.0 or later (installed on Ubuntu 16.04 LTS) |
To upgrade mdm versions 1.10.0
or later, installed on Ubuntu Server 16.04 LTS, you have to:
–upgrade
Ubuntu Server 16.04 LTS to Ubuntu Server 18.04 LTS:
see
“Quick
Guide: Upgrade Ubuntu 16.04 to 18.04” on page 37.
–upgrade
mdm stepwise via Ubuntu‘s package management tools:
Upgrade
the installed mdm version in two steps via the package management
tools of Ubuntu 18.04 LTS first to version mdm 1.11.x and then
to version mdm 1.12.x (see “Quick
Guide (Ubuntu): Upgrade mdm 1.11.x to 1.12.x” on page 38)
For
further information see “Minor
release updates” on page 40 and
“Ubuntu‘s package management tools”
on page 19. |
From
mdm 1.7.0 or later (installed on Ubuntu 16.04 LTS) |
To
upgrade mdm version 1.7.0 or later, installed on Ubuntu Server
16.04 LTS, you have to proceed stepwise:
1.Upgrade
the installed mdm version in several steps via the package management
tools of Ubuntu 16.04 LTS to the next possible version (mdm 1.7.x
>> 1.8.x >> 1.9.x >> 1.10.x).
2.Upgrade
mdm 1.10.x to mdm 1.11.x
as described above (From
mdm 1.10.0 or later). |
From
mdm < 1.7.0 |
mdm
versions < 1.7.0, installed on supported and unsupported
Linux systems, cannot be upgraded to mdm 1.12.x.
To reuse the databases of these
mdm versions on supported Linux systems, you have to:
–dump
and backup the databases,
–install
Ubuntu Server 18.04 LTS,
–install
mdm 1.12.x via
Ubuntu‘s package management tools on Ubuntu Server 18.04 LTS,
–import
the dumped databases.
Proceed as follows: |
|
|
A)Make database dumps of the mdm and mdm
CA server database
1.Copy
the required shell script files to the Linux system where mdm
is installed.
2.Execute
(as sudo) the shell script export_mdm_server.sh
.
3.Provide
the path where the database dump shall be saved
(default: /tmp/mdm-server.sql).
4.Provide
the password of the database user innomms
if required.
5.(If
necessary) Repeat 1–4 but execute
the shell script export_mdm_ca.sh to
dump the mdm CA server database (default:
mdm_ca_server.sql, database
user = mdmca). |
|
B)Keep a backup copy of the database dumps
1.Open
the directory where the database dumps have been saved.
2.Copy
the database dump(s) created at (A) to a secure place (e.g. a
secure backup folder at another company server). |
|
C)(If necessary) Backup the pull server configuration
1.To
backup the web server configuration file, copy the following server
configuration file to a secure place. E.g. if you are using Apache
2.x, your configuration file may in:
/etc/apache2/sites-available/your-server.conf
.
–If
your server configuration defines any aliases for the pull configuration
directory, write them down. They may look like:
Alias /atv/ “/var/www/mdm-pull/"
Alias /atv
“/var/www/mdm-pull/"
2.To
backup the certificate and private key, proceed as follows:
–Check
the configuration file from step (1.) (e.g. /etc/apache2/sites-available/your-server.conf)
and look for the certificates used by your server. E.g. if you
are using Apache 2.x, the entries may look like:
SSLCertificateFile
/etc/mdm/mdm-pull-server/cert.pem
SSLCertificateKeyFile
/etc/mdm/mdm-pull-server/key
–Copy
those files to a secure place, using the following file names:
<path
to certificate>/cert.pem
<path
to certificate>/key |
|
D)Install mdm 1.12.x and desired components
via Ubuntu‘s package management tools
1.Use
Ubuntu‘s package management tools as described in Chapter 2.2.2.
|
|
E)Import the dumped databases (mdm server and
mdm CA server)
1.Make
the dumped databases available on the system where mdm 1.12.x has
been installed.
2.Execute
(as sudo) the shell script import_mdm_server.sh
.
3.Provide
the path to the database dump (default: /tmp/mdm-server.sql).
4.(If
necessary) Repeat 1–3 but execute
the shell script import_mdm_ca.sh to
import the dumped mdm CA server
database (default: mdm_ca_server.sql,
database user = mdmca).
5.mdm
will restart automatically and connect to the imported databases.
|
|
F)(If necessary) Update the firmware upgrade/pull
server configuration
1.Stop
(as sudo) the Apache Web Server: service
apache2 stop
2.If
your previous configuration defined aliases for the pull configuration
directory (check files backup up and stored in step (C)), edit
the Apache configuration file of your new mdm installation:
/etc/mdm/mdm-webbase/30-configpull.conf
–Add
the aliases of your previous configuration (do not change the
real export directory: /var/www/mdm/).
E.g.:
Alias /atv/
“/var/www/mdm/"
Alias /atv “/var/www/mdm/”
3.Copy
the certificate and private key, backed up and stored in step
(C) to
/etc/mdm/mdm-webbase/cert.pem
/etc/mdm/mdm-webbase/key
4.Start
(as sudo) the Apache Web Server: service
apache2 start |
Upgrade
from Microsoft Windows systems |
All
mdm versions |
To
reuse the databases of mdm versions, installed on Windows systems,
on Ubuntu Server 18.04 lTS, you have to:
–dump
and backup the databases,
–install
Ubuntu Server 18.04 LTS,
–install
mdm 1.12.x via
Ubuntu‘s package management tools on Ubuntu Server 18.04 LTS,
–import
the dumped databases.
Proceed as follows: |
|
|
A)Make database dumps of the mdm and mdm
CA server database
1.Copy
the required batch files to the Windows system where mdm is installed.
2.Execute
(as administrator) the batch file export_mdm_server.bat
.
3.Provide
the path where the database dump shall be saved
(default: C:\Users\username\Documents\mdm-server.sql).
4.Provide
the path to your current mdm installation directory
(default: C:\Program Files\mGuard
device manager).
5.Provide
the password of the database user innomms
if required.
6.Press
any key to close
the command prompt when the database dump generation has finished.
7.(If
necessary) Repeat 1–6 but execute
the batch file export_mdm_ca.bat to
dump the mdm CA server database (default:
mdm_ca_server.sql, database
user = mdmca). |
|
B)Keep a backup copy of the database dumps
1.Open
the directory where the database dumps have been saved.
2.Copy
the database dump(s) created at (A) to
a secure place (e.g. a secure backup folder at another company
server). |
|
C)(If necessary) Backup the pull server configuration
1.To
backup the web server configuration file, copy the following file
to a secure place:
<path
to mdm installation>\apache\conf\extra\httpd-mdm.conf
–Search
for the following entries (your entries may differ from the default
settings of the mdm Installer given below) and write down the
aliases of the pull config server:
#
Verzeichnis für ATV-Profile (wie in preferences.xml eingestellt).
#
Alias /atv/ /var/apache-data/atv/
#
<Directory /var/apache-data/atv/>
Alias
/atv/
“C:/Program Files/mGuard device manager/apache-data/atv/"
Alias
/atv “C:/Program
Files/mGuard device manager/apache-data/atv/"
2.To
backup the certificate and private key, copy the following files
to a secure place:
<path
to mdm installation>\apache\conf\server.crt
<path
to mdm installation>\apache\conf\server.key |
|
D)Install mdm 1.12.x and desired components
via Ubuntu‘s package management tools
1.Use
Ubuntu‘s package management tools as described in Chapter 2.2.2.
|
|
E)Import the dumped databases (mdm server and
mdm CA server)
1.Make
the dumped databases available on the system where mdm 1.12.x has
been installed.
2.Execute
(as sudo) the shell script import_mdm_server.sh
.
3.Provide
the path to the database dump (default: /tmp/mdm-server.sql).
4.(If
necessary) Repeat 1–3 but execute
the shell script import_mdm_ca.sh to
import the dumped mdm CA server
database (default: mdm_ca_server.sql,
database user = mdmca).
5.mdm
will restart automatically and connect to the imported databases.
|
|
F)(If necessary) Update the firmware upgrade/pull
server configuration
1.Stop
(as sudo) the Apache Web Server: service
apache2 stop
2.If
your previous configuration defined aliases for the pull configuration
directory (check files backup up and stored in step (C)), edit
the Apache configuration file of your new mdm installation:
/etc/mdm/mdm-webbase/30-configpull.conf
–Add
the aliases of your previous configuration (do not change the
real export directory: /var/www/mdm/).
E.g.:
Alias /atv/
“/var/www/mdm/"
Alias /atv “/var/www/mdm/”
3.Copy
the certificate and private key, backed up and stored in step
(C) to
/etc/mdm/mdm-webbase/cert.pem
/etc/mdm/mdm-webbase/key
4.Start
(as sudo) the Apache Web Server: service
apache2 start |
2.3.4Using batch files and shell
scripts
Dump and import of the databases can be executed
using batch files (Windows) and shell scripts (Linux) provided by Phoenix
Contact available in the PHOENIX CONTACT Webshop (phoenixcontact.net/product/2981974).

Migrating mdm installations with the
provided batch files/shell scripts restores only the database(s)
dumped and imported. Any other installation data (e.g. pull server
certificate and config files) must be manually copied to the new
installation as explained below. |

The provided batch files/shell scripts
will only work in case of standard mdm installations (check default
database names, ports, and user names in the provided preferences.xml and
ca-preferences.xml files). |
If mdm 1.12.x has
been successfully installed via the mdm
1.12.x Installer for Windows or Ubuntu‘s package management
tools, the batch files/shell scripts have been installed automatically
in the following system folders:
Microsoft
Windows
mdm server and mdm CA server: <path
to mdm installation>\data\db_migration\
Ubuntu Linux
mdm server: /usr/share/mdm-server/db_migration/
mdm CA server: /usr/share/mdm-ca/db_migration/
Table 2-4
Windows batch files
Name |
Description |
export_mdm_server.bat |
Windows batch file to dump the
mdm server database |
export_mdm_ca.bat |
Windows batch file to dump the
mdm CA server database |
import_mdm_server.bat |
Windows batch file to import
the dumped mdm server database |
import_mdm_ca.bat |
Windows batch file to import
the dumped mdm CA server database |
Table 2-5
Linux shell script files
Name |
Description |
export_mdm_server.sh |
Linux shell script file to dump
the mdm server database |
export_mdm_ca.sh |
Linux shell script file to dump
the mdm CA server database |
import_mdm_server.sh |
Linux shell script file to import
the dumped mdm server database |
import_mdm_ca.sh |
Linux shell script file to import
the dumped mdm CA server database |
2.3.5Known
issues
1.CA database migration using equal CA certificate
attributes
Issue
If the mdm CA database migration (via provided
database export/import scripts) to a newly installed mdm version 1.12.x
on Windows
–from
a different operating system or
–from
an installed mdm version < 1.11.0
is done using the same CA certificate attributes
on the new mdm 1.12.x installation,
the mdm CA server will fail to start.
Solution
During the installation of mdm 1.12.x
do not provide all certificate attributes of the CA identical to the
ones of the older installation (e.g. add a suffix to the Common
Name).
2.Different HTTP Server Directory Structure and
Password Protection in Ubuntu and Windows
Issue
The HTTP server directory structures created
by the mdm Installer for Windows
and Ubuntu‘s package managing tools are different:
–In
Windows, the server access is password protected, and three different
directories are used: “atv”, “crl”, and “fw”, where "fw" is
defined as the root directory.
–In
Ubuntu, the server access is not password
protected, and the server root directory is used to store pull configuration
files, firmware upgrade packages and CRL files.
Solution
To enable password protection in Ubuntu, proceed
as follows:
a)Edit
the file “/var/www/mdm/.htaccess”
and uncomment and edit the existing lines:
AuthType Basic
AuthName "username"
AuthUserFile /etc/mdm/mdm-webbase/.htpasswd
Require valid-user
Where
"username" must be
replaced with the username you want to grant the access to.
b)Use
(as sudo) the Apache tool “htpasswd”
to create the desired user password configuration in the file “/etc/mdm/mdmwebbase/.htpasswd”:
sudo htpasswd -c /etc/mdm/mdm-webbase/.htpasswd
username
Where "username"
must be replaced with the username you want to grant the access to. You
will be asked to introduce the desired password.
To use the same directory structure in Ubuntu
and Windows, proceed as follows:
a)Edit
the file “/etc/apache2/sites-available/mdm-webbase-ssl.conf”:
Define the aliases “atv”,
and “crl”.
E.g.:
Alias "/atv/" "/var/www/mdm/"
Alias "/atv" "/var/www/mdm/"
Alias "/crl/" "/etc/mdm/security/crl/"
Alias "/crl" "/etc/mdm/security/crl/"
<Directory
/etc/mdm/security/crl/>
Options +Indexes -FollowSymLinks +Multiviews
AllowOverride
All
Require
all granted
</Directory>

This will not change the real directory
structure in the system, but will make it possible for already
configured mGuard s which expect the directories
atv, and crl to
download pull configurations, and CRL files successfully.
If you additionally want to have the same directory structure in
the system, you have to create the corresponding directories and
define the access permissions of each in mdm-webbase-ssl.conf. |
2.4Quick Guide: Upgrade Ubuntu
16.04 to 18.04
Versions
from mdm
1.11.0 or later can only be installed on Ubuntu
(Server) 18.04 LTS.

NOTE: Data loss during the upgrade
process
Backup your files before you upgrade
the system. |
Backup mdm and
mdm CA server databases of
the current mdm installation
1.Copy
the required shell script files to the Linux system where mdm is installed.
2.Execute
the shell script export_mdm_server.sh (as
sudo/adminstrator).
3.Provide
the path where the database dump shall be saved
(default: /tmp/mdm-server.sql).
4.Provide
the password of the database user innomms
if required.
5.(If
necessary) Repeat 1–4 but execute
the shell script export_mdm_ca.sh to
dump the mdm CA server database (default:
mdm_ca_server.sql, database
user = mdmca).
6.Copy
the created database dumps to a secure location (such as a secure backup
directory on another server in the organization).
Upgrade Ubuntu
16.04 LTS to Ubuntu 18.04 LTS
1.Reload
the package information:
sudo apt update
2.Update
the packages installed under Ubuntu 16.04 LTS:
sudo apt upgrade
3.Start
the upgrade to Ubuntu 18.04 LTS:
sudo do-release-upgrade
4.Follow
the on-screen instructions or press Enter to continue the upgrade if necessary.
2.5Quick Guide (Ubuntu): Upgrade
mdm 1.11.x to
1.12.x

If mdm 1.12.x
is installed via the command line, the variable
DEBIAN_FRONTEND must
be used with the value readline.
This is obligatory to display and accept the Software
License Terms (SLT). |
1.Use
a text editor to change the mdm software
repository from 1.11.x/ to 1.12.x/
in Ubuntu‘s /etc/apt/sources.list:
sudo nano /etc/apt/sources.list
2.Alternatively
you can use the following command to add the mdm
software repository of version 1.12.x to your package management
tools:
sudo apt-add-repository „deb http://repositories.mguard.com/mdm 1.12.x/“
3.Reload
the package information:
sudo apt update
4.Start
the upgrade to mdm 1.12.x:
sudo
DEBIAN_FRONTEND=readline apt upgrade
5.Agree
to the Software License Terms
(SLT).
2.6Quick
Guide (Ubuntu): Upgrade mdm 1.10.x
to 1.11.x

If mdm 1.11.x is
installed via the command line, the variable DEBIAN_FRONTEND must
be used with the value readline.
This is obligatory to display and accept the Software
License Terms (SLT). |
1.Use
a text editor to change the mdm software
repository from 1.10.x/
to 1.11.x/ in Ubuntu‘s
/etc/apt/sources.list:
sudo nano /etc/apt/sources.list
2.Alternatively
you can use the following command to add the mdm
software repository of version 1.12.x to your package management
tools:
sudo apt-add-repository „deb http://repositories.mguard.com/mdm 1.11.x/“
3.Reload
the package information:
sudo apt update
4.Start
the upgrade to mdm 1.11.x:
sudo
DEBIAN_FRONTEND=readline apt upgrade
5.Agree
to the Software License Terms
(SLT).
2.7Update
PostgreSQL databases (cluster)
After an upgrade from Ubuntu 16.04 LTS to
Ubuntu 18.04 LTS the PostgreSQL 9.5 version
remains installed on the system. PostgreSQL
10 will be installed, when the installed mdm version is upgraded
to mdm 1.11.x.
The mdm
server and CA server databases,
created with earlier mdm versions, were created with
PostgreSQL 9.5. However, this is not a problem as PostgreSQL
10 is backward compatible and supports databases created with
older versions.
An adaptation of the existing mdm
server and CA server databases
is therefore not necessary for the operation of
mdm 1.11.0 (or newer)!
2.8Upgrade
mdm 1.12.x to
later versions
2.8.1Microsoft
Windows (mdm and components)
Minor and patch release updates
Minor
release updates from mdm 1.12.x
to the next minor release (1.13.0)
and patch release updates (e.g. mdm 1.12.0
to 1.12.1)
can usually
be installed via the mdm
Installer for Windows which will be part of the respective release
(see the respective Release Notes).
mdm third-party components
Third-party components will be upgraded by
the mdm Installer for Windows during
minor and patch release updates.
2.8.2Ubuntu
Linux (mdm and components)
Minor
release updates
Minor
release updates from mdm 1.12.x
to the next minor release (1.13.0)
can usually
be installed automatically via Ubuntu‘s package management
tools. In this case the release_name
of the mdm minor version in the file sources.list
has to be adapted (see corresponding Release Notes).
Patch release updates
Patch release updates (e.g.
mdm 1.12.0
to 1.12.1) can
be installed automatically via Ubuntu‘s package management tools without
changing the file sources.list.
mdm third-party compnents
mdm third-party components can be upgraded
via Ubuntu‘s package management tools.
2.9Uninstall
mdm 1.12.x and
components
mdm 1.12.x
and components can be uninstalled from the system using its own Windows
uninstaller, Microsoft Window‘s standard uninstall procedures (e.g. Control Panel\Programs\Programs and
Features) or Ubuntu‘s package management tools.